|

|

|


|
Calendars |
Adding a New Calendar
To add a new calendar, follow these steps.
See Also: Calendar Permissions
- Access the Calendars screen.
- Click the Add Calendar button (
 ).
). - The Add or Edit Calendars screen appears. The following table explains each field on the screen.
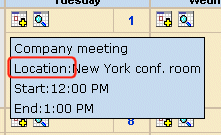
SectionDescriptionTitleEnter a calendar title, which identifies the calendar in the Workarea.DescriptionEnter a calendar description, which appears on the Calendar Modules screen to help identify the calendar.Location LabelSpecify the label text for the location field. The location appears with the detail of a calendar event.
 Start Time LabelSpecify a label for the start time. A calendar event can display the start time.End Time LabelSpecify a label for the end time. A calendar event can display the end time.Display WeekendsPlace a check in this box if you want the calendar to display Saturdays and Sundays along with weekdays.To display weekdays only, remove the check. See Also: Display WeekendsForward OnlyTo have the calendar display only events from the date when someone views the calendar forward (but no past events), place a check in the box next toShow only events that fall after the viewing dayHowever, a logged-in user can view past calendar events.Event Type LabelOne section of the Add Calendar Events screen displays available event types and lets the user assign them to the event.
 By default, this text is Event Type:. To change the default text, edit this field.Event Types AvailableIf you want to allow users to assign event types to events on this calendar, check this box.Event Types RequiredIf you want to require users to assign event types when adding events, check this box.This checkbox can only be checked if Event Types Available is checked.InstructionsIf you allow users to filter a calendar view by event type, text appears at the bottom of the screen that explains how to use the selection box. By default, this text is Select Event Type To View.
 If you want to change this text, edit this field.Show All labelIf you allow users to filter a calendar view by event type, the list of event types appears at the bottom of the screen. On top of the list is text indicating that all event types will appear on the calendar. By default, this text is Show All.
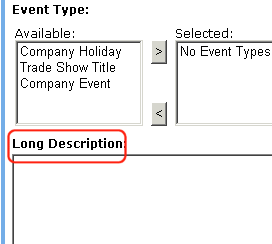
 If you want to change this text, edit this field.Long DescriptionThis field can allow the user to enter additional information about a calendar event.
 Your choices are:
- No Long Description - no additional description is allowed
- Text Only - while adding an event, a user can enter text into a Long Description box. No formatting is allowed within this text.
This text appears in the Event View screen and in the XML Packet. Because the text is not formatted, the XSL creator is responsible for its display.Content FolderSpecify the calendar's content folder. To understand how folder assignment affects calendar use, see Calendar Permissions. - After you enter calendar information, click the Save button (
 ).
).
See Also: Calendars


|

|

|

|