|

|

|


|
URL Aliasing |
Enabling Manual Aliasing
If you do not see a URL Aliasing option under Settings > Configuration, follow these steps to enable it.
Note
Before editing your web.config file, you should close all open browsers. In some instances, you may need to do an IIS reset.
- Open the web.config file, located in your Web site's root folder.
- Change the value of ek_RedirectorInstalled to True.
Note
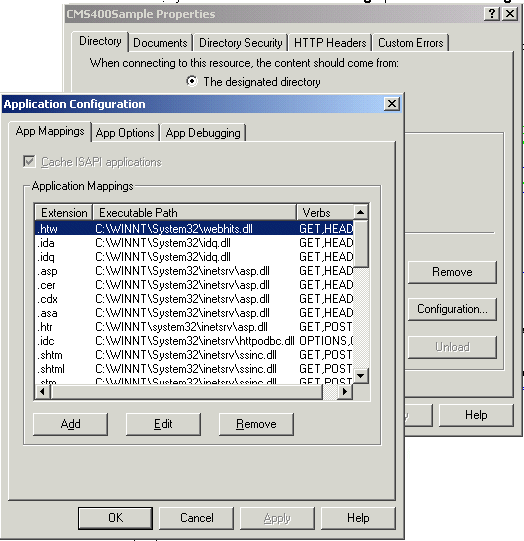
You only need to perform step 3 if you want add content blocks with an extension other than those already registered, such as .aspx. The App Mappings tab on the Application Configuration screen (illustrated below) indicates which extensions are registered on your server.
- After ek_RedirectorManualExt, set a comma-delimited list of Web page extensions for which you will want to create aliased pages. For example, ".aspx,.htm,.html,". By default .aspx is in the list.
Note
You can enter one or more extensions. Each extension must begin with a period, and the last extension must be followed by a comma (,).
- Enable the httpHandlers element. To do so, uncomment the following tags by removing all dashes and the exclamation point (!):
<!--httpHandlers> </httpHandlers-->
The tags are separated by several lines that look like this:
<add verb="*" path="*.gif" type="URLRewrite.StaticFileHandler,Ektron.Cms.URLRewriter" />
- Save web.config.
- Open IIS, go to the Web site, and right-click Properties.
- Click the Directory tab.
- Click the Configuration button.
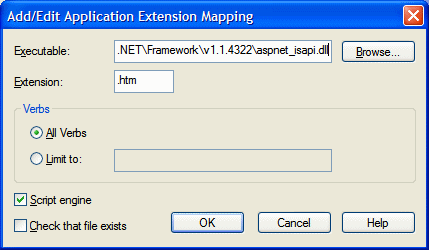
- On the App Mappings tab, click Add. (On Windows 2003 Server, click Insert.)


Note
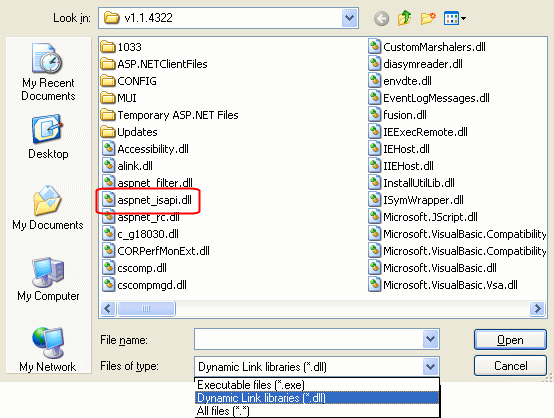
Use the latest version of the asp.net_isapi.dll. The default location is c:\windows\Microsoft.NET\Framework\latestversion\aspnet_isapi.dll.
In the path, latestversion refers to the v1.1.4322 folder or the folder that contains the latest version.
Warning!
IIS sometimes abbreviates the path in the Executable field, causing the OK button to be grayed out. If the text box does not contain the full path, IIS cannot validate the path. To remedy this, click in the Executable field. The full path appears, and the OK button is active.

Note
When browsing to the aspnet_isapi.dll folder, you may need to change the Files of Type dropdown to .dll or all files. It is set to .exe by default.
- In the Add/Edit Application Extension Mapping dialog's Extension field, enter the correct characters to indicate you want to allow all extensions.
| Server Platform |
Your entry in the Extension field |
|---|---|
| Windows 2000 |
*.* |
| Windows XP |
.* |
| Windows 2003 server |
a wildcard handler |
- Under Verbs, check Limit to. Then, enter GET, HEAD, POST, DEBUG.
- Uncheck Check (or Verify) that file exists.
- Click OK.
Note
If the OK button is grayed out, click the cursor inside the Executable field to activate the OK button.


|

|

|

|