
|

|

|


|
Load Balancing |
Setting Up Virtual Directories
Through Internet Information Services (IIS) on both Web servers, create virtual directories for all image or file folders used with your load balancing model. In addition, change the default UploadedImages and UploadedFiles' directories to virtual directories.
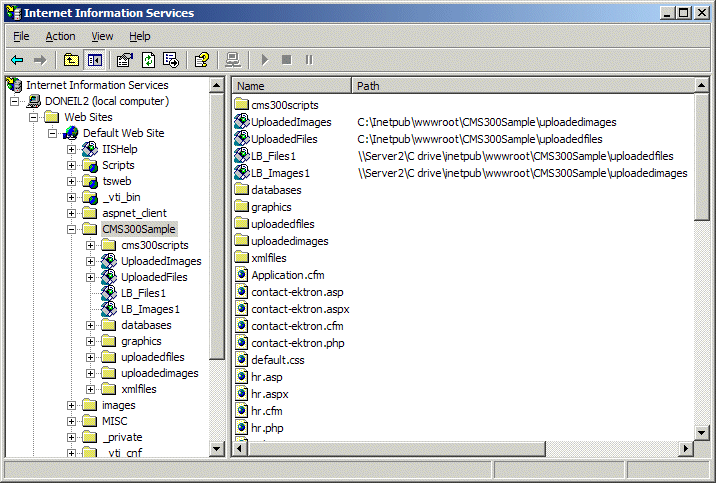
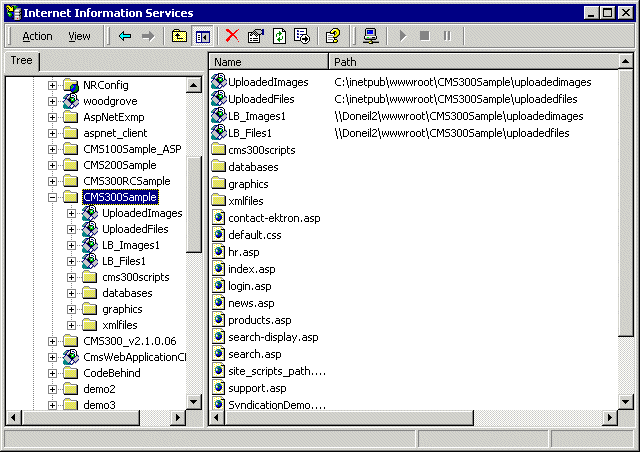
For our example, we create the following virtual directories on both Ektron CMS400.NET Web server machines.
These four identical, virtual directories must exist in the IIS console for each Web server machine used in your load balancing model.
Displayed below is how the machines should be configured.
IIS on Computer1
IIS on Computer2
Why Must the Virtual Directory Names Be Identical?
The virtual directory names must be identical because, when load balance paths are created in Ektron CMS400.NET, they are stored in one database. The names of the load balance paths in Ektron CMS400.NET are unique, but depending on the Web server machine that a user is on, IIS resolves the path to point to the virtual directory stored on that Web server machine.
A load balance path is called LB_Images1. Ektron CMS400.NET talks to IIS and resolves the path for the virtual directory LB_Images1, which happens to be \\{Computer1}\C:\InetPub\wwwroot\400Sample\UploadedImages.
However, if the Web site is accessed from another Web server machine, the load balance path LB_Images1 points to the physical directory \\{Computer2}\C:\InetPub\wwwroot\400Sample\UploadedImages.
Important!
In order for the load balancing model to work correctly, the virtual directories on each Web server must be identical!
Creating a Virtual Directory
This section explains the steps needed to create a virtual directory in IIS. To create a virtual directory:
- Access your IIS management console.
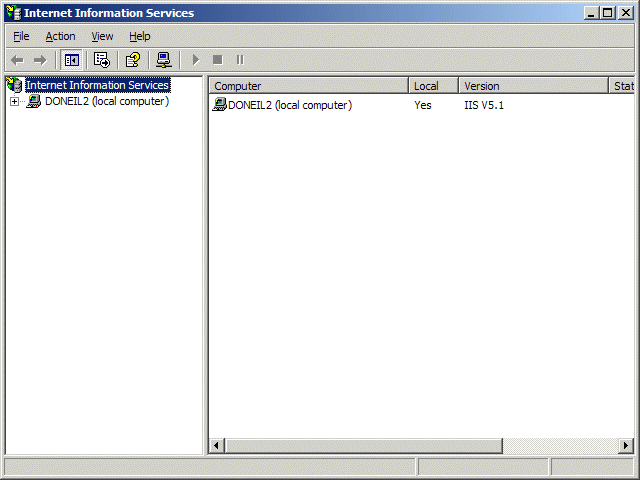
- In the folder tree on the left side of the console, navigate to the Ektron CMS400.NET Site root folder. In this case, it is 400Sample.
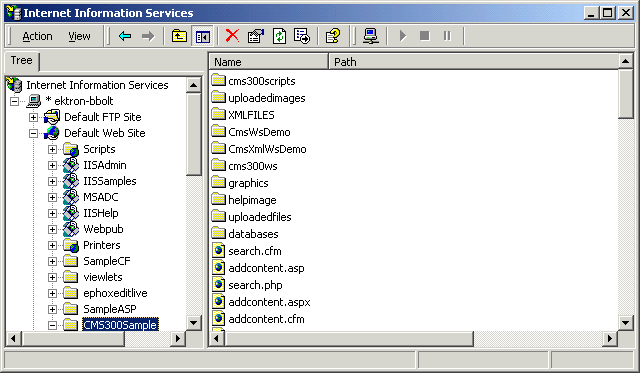
- In the toolbar at the top of the screen, follow the path
Action > New > Virtual Directory...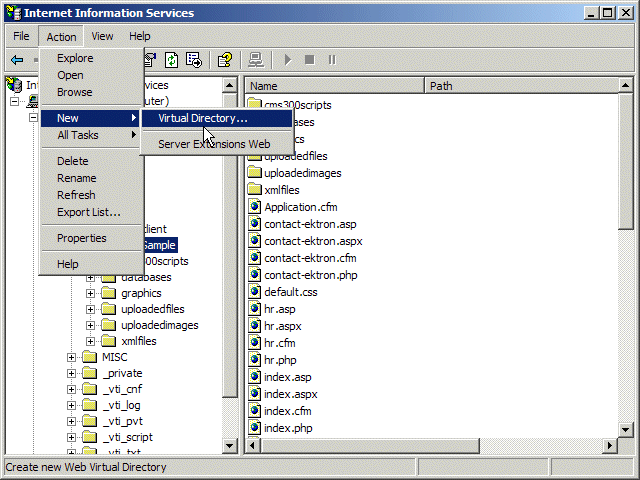
- The Virtual Directory Creation Wizard is displayed.
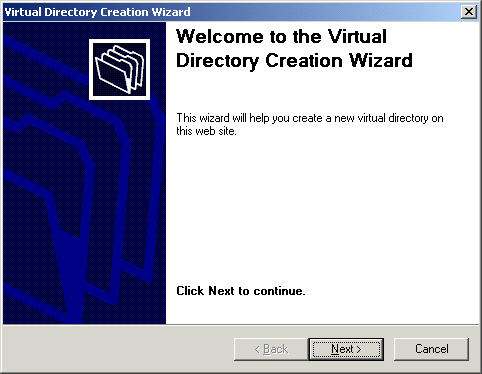
- Click Next to proceed.
- The Virtual Directory Alias screen is displayed.
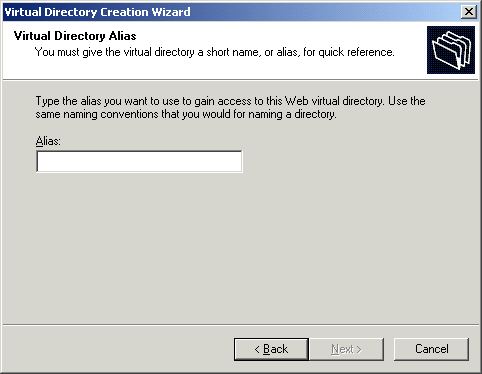
- Enter an alias for the virtual directory. This name will reference the virtual directory in Ektron CMS400.NET.
- Click Next to continue.
- The Web Site Content Directory screen is displayed.
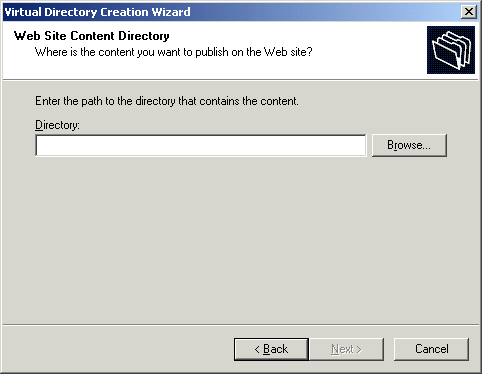
- Enter the path to the directory to be used for the virtual directory, or click the Browse button to locate it.
Note
The path is constructed using \\{ComputerName}\{FilePath} format.
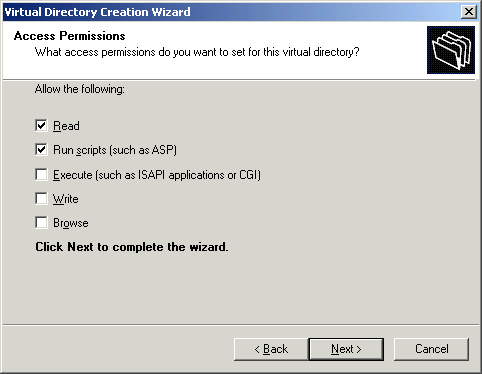
Note
At a minimum, the IIS user needs read and write permissions.
- Click Next to complete the wizard.
- A confirmation notifies you that you have created a virtual directory. Click the Finish button.
- The IIS console is displayed with the virtual directory added to the specified location.
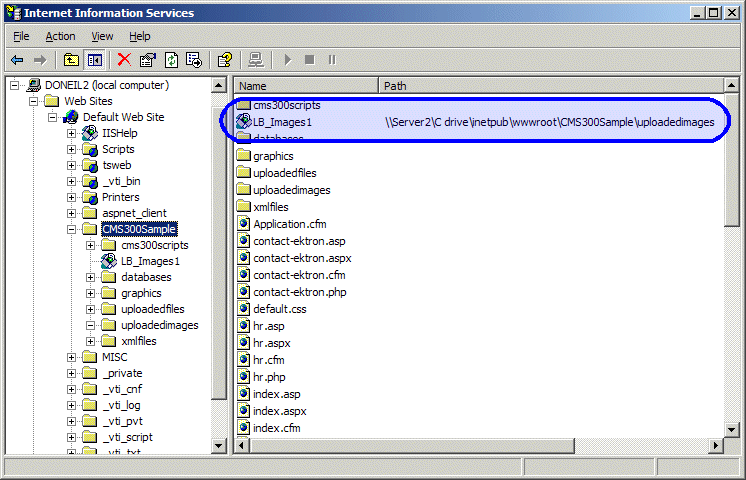
- Repeat the above steps for each virtual directory that you need to create on each Web server running Ektron CMS400.NET.
Note
Remember, the names of the virtual directories on each server must be identical!


|

|

|

|