
|

|

|


|
Load Balancing |
Setting Up Ektron CMS400.NET Load Balancing
After setting up the virtual directories on both Web server machines, you are ready to create the load balance paths in Ektron CMS400.NET.
Review
Before we begin, let's review the virtual directories that have been created.
Setting Up Load Balance Paths in Ektron CMS400.NET
In this section, we set up load balance paths in Ektron CMS400.NET that point to the LB_Images1 and LB_Files1 virtual directories that we created earlier.
Note
For additional information about working with load balance paths in Ektron CMS400.NET, refer to Load Balancing.
To add a load balance path in Ektron CMS400.NET:
- Log in as an administrator to an Ektron CMS400.NET Web site you set up in Setting Up Multiple Ektron CMS400.NET Web Sites.
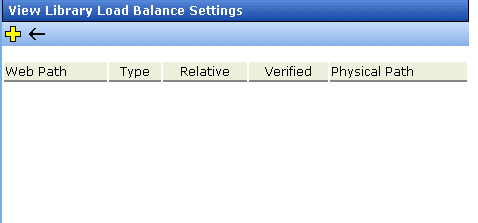
- Access the Load Balance Settings Screen in the library folder, as described in Accessing Library Load Balancing Screen.
- Click the Add button (
 ).
). - The Add a Library Load Balancing Path screen is displayed.
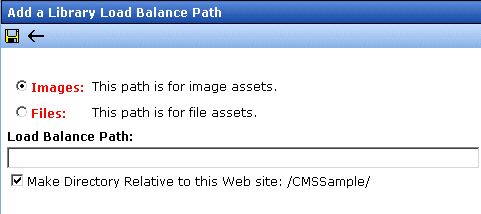
- Use the following table to help you fill out the form.
- Click the Save button (
 ) to save and add the new load balance folder to the Ektron CMS400.NET library.
The screen is refreshed, and the View Library Load Balance Settings screen is displayed with the changes reflected.
Notice the green check. It notifies you that IIS on the current Web server successfully resolved the virtual directory and located its physical folder.
- To further verify the load balance path is working successfully, look at the View Library Load Balance Setting screen in the Workarea for the other Ektron CMS400.NET Web server machine.
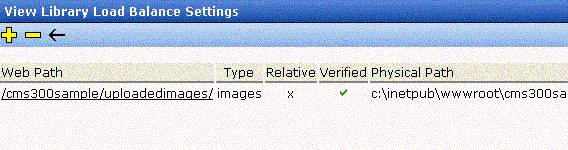
Notice that the two Web path names are identical, but the physical paths are different. This proves that IIS resolved each one differently.
|
|

|
|
|