|

|

|


|
Managing Content |
Adding HTML Content
As an administrator, you can add content to the Ektron CMS400.NET Web site by creating new content blocks. To add HTML content, follow these steps.
Note
When selecting the folder, keep in mind the permissions that are set on it and which users have permissions for it.
- Select the language of the new content block from the language drop-down. See Also: Working with Multi-Language Content
- Click the Add Content button (
 ).
). - The Add Content window opens.

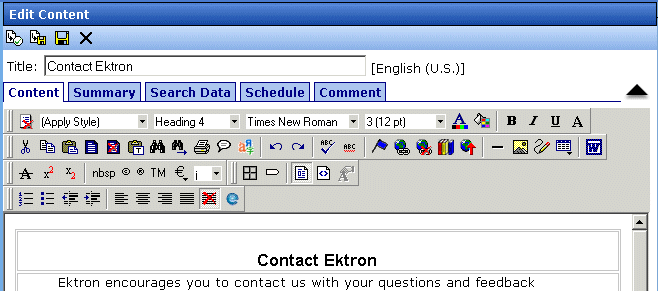
- Create content in the editor using the following table
.FieldDescriptionTitleEnter a title for the content block.Add to Quicklinks TableCheck this box if you want to save a Quicklink to this content block when you save it.If you uncheck this box, Ektron CMS400.NET does not create a Quicklink for this content block.Content SearchableCheck this box if you want this content block to be included in an external search of your CMS Web site.If you uncheck this box, Ektron CMS400.NET excludes the content block when a search is performed.See Also: Searching Content on the Web SiteBody TextInsert content that will be viewed on the Web site.
Note
For additional information about using the editor supplied with Ektron CMS400.NET, see Introduction to eWebEditPro+XML.
- After you enter the content, you have the following options
.Button or TabDescriptionSummaryEdit the summary for content block. See Also: Adding a Content Block Summary
Note: You can restrict a summary's length in the configuration setup screen.
MetadataEdit the metadata for content block. See Also: MetadataScheduleAssign start or end dates, or both, for when content is published to Web site. See Also: Scheduling Content to Begin and EndCommentEnter history comment to indicate changes made to content. SubmitSubmit content block into approval process. See Also: Approving/Declining Content Blocks
 PublishPublish content to Web site.
Note: If a content block has any active tasks, a comments window pops up. You can insert comments to describe how approving or declining the content affects the task.
Note: Only the last approver in the approval chain sees this button.
 Check InSave and check-in content. Clicking this button does not submit the content into the approval process, but rather lets other users change it.
 SaveSave the content without submitting it into the approval process.If a user clicks save and then closes the editor, other users cannot edit the content.
 DeclineThis button appears if you are the next approver in the approval list. Click it to decline the changes made to the content.
Note: If a content block has any active tasks, a comments window pops up. You can insert comments to describe how approving or declining the content affects the task.
 CancelClose the editor without saving changes.


|

|

|

|