
|

|

|


|
Managing Tasks |
View Categorization Screen
The View Categorization screen allows administrators to work with Task Categories and Task Types. From this screen you can create, edit, and delete them.
See Also: Task Categories and Types
To access the View Categorization Screen, access the Workarea > Settings > Configuration > Task Types.
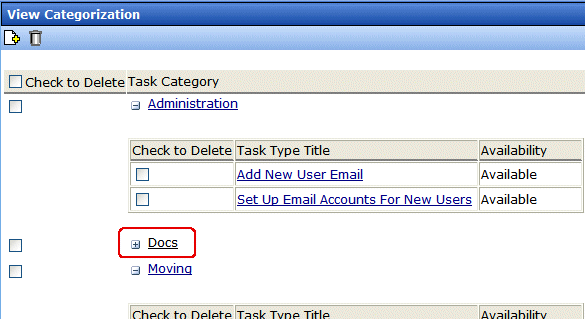
While in the View Categorization screen, you can collapse and expand Task Categories. To collapse a Task Category, click the ( ) button next to the Task Category name. To expand one, click the (
 ) button next to the Task Category name.
The following example shows the View Categorization screen with one Task Category minimized.
Creating Task Categories and Task Types
From the View Categorization screen, you can create Task Categories and Task Types by clicking the Add Task Button ( ). When you do, the following screen appears.
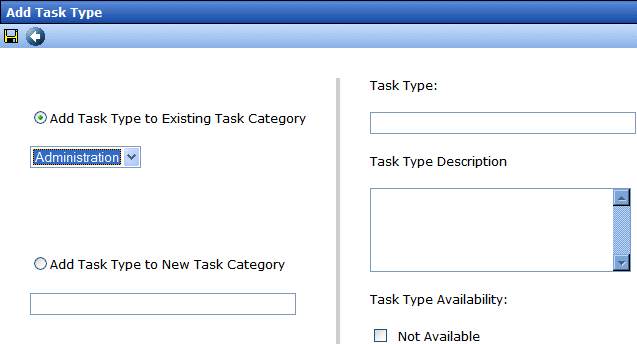
- Add a Task Type to an existing Category
- Create a new Task Category and Task Type
- Edit a task category
- Edit a task type and description
- Define Task Type availability
Adding a New Task Category and Task Type
To add new Task Category and Task Type, follow these steps.
See Also: Task Categories and Types
- Click the Add Task Type button (
 ).
). - The Add Task Type Screen appears.
- Click the Add Task Type to New Task Category radio button or in the text box.
- Enter a name in the New Task Category field.
- Add a Task Type name in the Task Type field.
- Enter a Task Type Description.
- Choose a Task Type Availability. See Also: Task Type Availability
- Click Save (
 ).
). - Your new Task Categories and Task Types appear on the View Categorization screen.
Adding a New Task Type to an Existing Task Category
To add new Task Type to an existing Task Category, follow these steps.
- Click the Add Task Type button (
 )
) - The Add Task Type Screen appears.
- Click the Add Task Type to New Task Category radio button or click the drop down box.
- Choose a category from the drop down box.
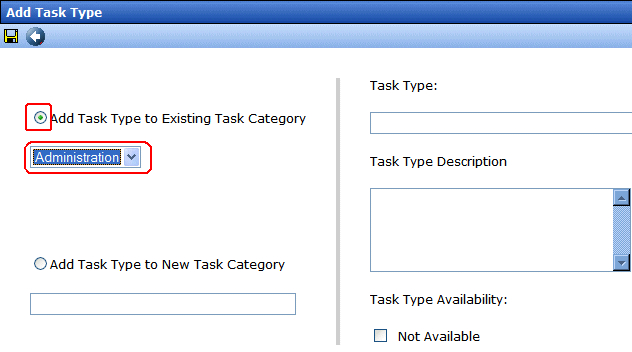
- Complete Steps 5 - 9 from Adding a New Task Category and Task Type.
Editing Task Category
You can edit a Task Category names. To edit a Task Category, click the Task Category link.
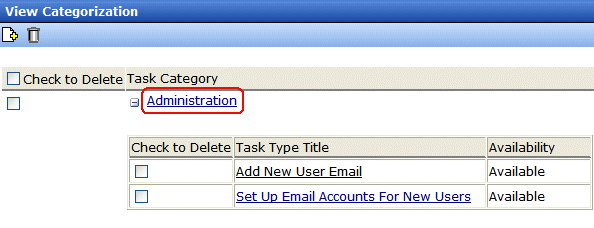
A text box screen appears next to the category name. Use the text box to change the name.

You can either save ( ) the changes, or cancel (
 ) the edit.
Editing a Task Type
From the View Categorization screen, you can edit a Task Type. This allows you to change the Task Type name, Task Type description, and Task Type availability.
To edit a Task Type, follow these steps.
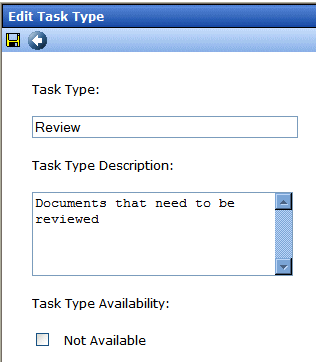
From this screen you can edit the following:
- Task Type
- Task Type Description
- Task Type Availability. See Also: Task Type Availability
Task Type Availability
Task Types can be hidden from users by clicking the Not Available check box in the Add Task Type and Edit Task Type screens. By making a Task Type not available, you can suppress without deleting it.
When you make a Task Type not available, you see the following warning.

After you make a Task Type not available, the assigned tasks' Type and Category are changed to Not Specified.
Deleting Task Categories and Task Types
You can delete Task Types by Task Category or individually.
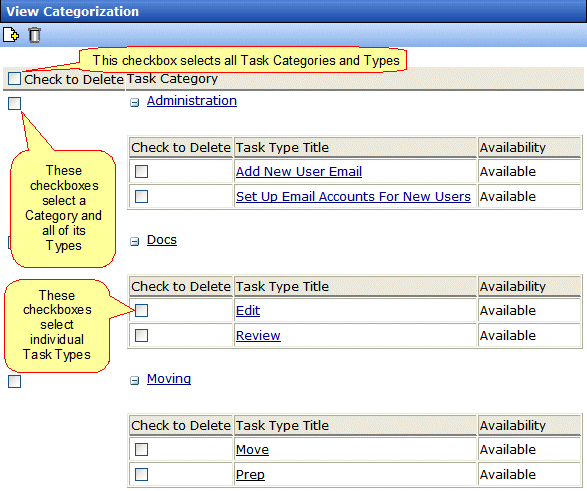
To delete a Task Type, click the check box next to the Task Type, then click the Delete ( ) button.
When you delete a Task Type, the following appears.

To delete all Task Types, check the Delete all check box.
The following example shows which check boxes on the screen are associated with All Task Types, Task Categories, and individual Task Types.


|

|

|

|