|

|

|


|
Using the Data Designer |
Rich Area ( )
)
Use a rich area field to let a user enter a free text response that can be formatted using the editor buttons.
See Also: Plain Text Field vs. Rich Area Field
Tip!
Unlike many other fields, the Rich Area dialog box does not prompt for a field caption. You can still enter text describing the field on the editor screen before or after you insert a Rich Area field.
Adjusting the Width of a Rich Area Field
Note that, unlike a plain text field, the width of a rich area field cannot be adjusted. It occupies the entire screen width. If a user enters more text than fits on one line, the rich area field automatically adds more lines. To limit the width of a rich area field, place it in a table cell. In this case, the field is as wide as the cell.
If you want to insert default text into a rich area field, insert it after you place the field in the editor.
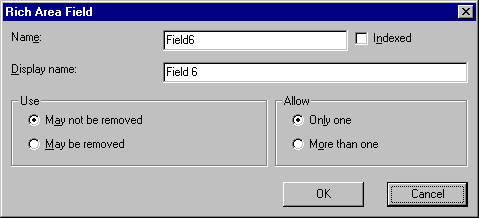
Dialog Box

Fields on the Rich Area Dialog
| Field |
Description |
|---|---|
| Name |
Enter the name of the field. Note that you cannot enter spaces nor most special characters (!@#$%^&*()+=<>,.:;'"{}[]\|`~) into this field. See Also: The Name Field's Default Value |
| Indexed |
Check if you want to index this field. For more information, see "Indexing the Fields of a Data Design Document" in the Supporting the Data Designer chapter of the Developer Reference Guide. The Indexed field may or may not appear, depending on how your administrator set up your system. |
| Display name |
Enter the text that appears when a user hovers the cursor over this field. |
| Use |
See The Use Field |
| Allow |
See The Allow Field |
| Cannot be blank |
If you want to require the user completing this field to enter a response, click inside this check box. |


|

|

|

|