|

|

|


|
Working with Menus |
Editing Types of Menu Items
This section explains how to edit the following types of menu items:
EditingSee Also: Working with Menus
Editing a Content Block Menu Item
To edit a content block menu item via its content folder or menus module, follow these steps.
- Navigate to the menu you want to edit by referencing Viewing a Menu.
- The View Menu screen displays the menu items.
- Click the edit icon (
 ) next to the content block (
 ) you want to edit.
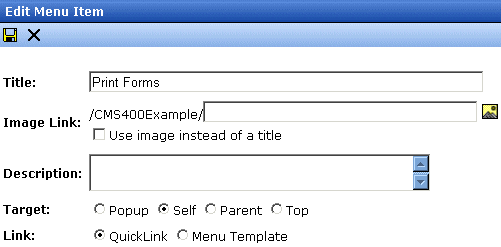
 - The Edit Menu Item screen opens.

Fields on the Edit Menu Item Screen
| Field |
Description |
|---|---|
| Title |
The name that was given to the menu item by the creator. Edit if needed. |
| Description |
Add a more detailed description for the content menu item that is being edited. |
| Image Link |
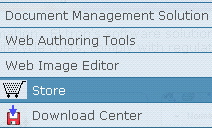
You can have an image appear next to or instead of the menu title. For example: 
To do this, follow these steps. Note: Before beginning these steps, the image must reside in the library. if it does not, add it before proceeding. For more information, see Copying Files to the Library. 1. Click the image icon (  ).
).2. The library window opens. 3. Navigate to the folder that contains the image you want to use. 4. Click the Insert button (  ) to insert it.
Using Image to Replace Title Text Alternatively, you can have the image replace the menu text, so that only the image appears to indicate the kind of information on the menu. To do this, check the Use image instead of a title checkbox. 
|
| URL Link |
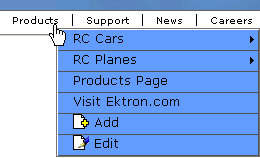
After you create a menu, your developer links it to text or an image on a Web page by modifying a page template. As a result, when a user reading that Web page moves the cursor over the text or image, the menu appears. In the illustration below, the menu appears when the user moves the cursor over Products. 
You can also assign a URL link to a menu, using this field. If you do, and the user clicks the link text or image, he jumps to the specified page. For example, in this field you assign the product landing page, CMS400Example/products.aspx. In the illustration above, if the user moves the cursor over Products, the assigned menu appears. However, if the user clicks Products (as indicated by the hand), he jumps to CMS400Example/products.aspx. Entering the Path to the Landing Page This path must be relative. For example: /400Sample/index.aspx This URL path can be a static template path (like the one mentioned above) or a dynamic path, such as /400Sample/index.aspx?id=25 |
| Target |
Select how the library menu item will display.
Note: By default, the target option is set to self. |
| Link |
See Template Link |
Editing a Library Asset Menu Item
To edit a library menu asset via its content folder or menus module, follow these steps.
- Navigate to the menu whose items you want to edit by referencing Viewing a Menu.
- The View Menu screen displays the menu items.
- Click the edit icon (
 ) next to the library asset (
 ) you want to edit.
 - The Edit Menu Item screen opens.
- Make changes to the library asset menu item. For documentation of the fields, see Fields on the Edit Menu Item Screen.
- Click the Save button (
 ).
).
Editing an External Hyperlink Menu Item
To edit an external hyperlink menu item via its content folder or menus module, follow these steps.
- Navigate to the menu that you want to edit by referencing Viewing a Menu.
- The View Menu screen displays the menu items.
- Click the edit icon (
 ) next to the external hyperlink (
 ) you want to edit.
 - The Edit Menu Item screen opens. Update as needed. Use the table below to guide you through the fields.
| Name |
Description |
|---|---|
| Title |
Title of the new external hyperlink menu item. |
| URL Link |
The URL link for the external hyperlink. For example, www.google.com. |
Editing a Submenu Menu Item
To edit a submenu menu item via its content folder or menus module, follow these steps.
- Navigate to the menu for which you want to edit the menu items for by referencing to Viewing a Menu.
- The View Menu screen opens, displaying a list of all menu items.
- Click the submenu icon (
 ) to display its contents.
| To edit a |
See this section |
|---|---|
| Content block |
|
| Library Asset |
|
| External Hyperlink |
|
| Submenu |


|

|

|

|